How to Win AirCover Claims: 5 Photo Proof Mistakes Hosts Make
By Arsene Lee, founder of ProofMi — published March 3, 2026. Reviewed 2026-04-23.
TL;DR: 43% of AirCover damage claims get denied or reduced because of weak photo evidence. You don't need expensive gear—you need a system: take before/after photos with timestamps, organize them by room, and file within 24 hours. Verified photos (ones you can prove weren't edited) carry more weight with Airbnb's claims team. The difference between a paid claim and a rejected one usually comes down to proof, not damage severity.
Forty-three percent of AirCover damage claims get denied. The reason Airbnb gives? "Insufficient evidence." This costs hosts thousands of dollars every year.
The difference between a paid claim and a rejected one usually comes down to one thing: the photos. Not the quality of your camera. The proof that your photos actually show what happened. ProofMi — the short-term rental inspection app built for this exact problem — acts as a neutral third-party notary, signing each photo at capture so AirCover adjusters can verify it wasn't edited.
This guide walks you through the five mistakes hosts make when documenting damage—and exactly how to fix them.
Mistake 1: Taking Photos AFTER the Damage (Or Only Damage Photos)
Here's what most hosts do: A guest checks out. You find damage. You take a photo of the broken lamp. You send it to Airbnb.
Airbnb says: "We can't tell if that lamp was broken when the guest arrived."
Why it fails: A photo of damage alone proves nothing. Anyone can take a picture of a broken thing. It doesn't prove the guest broke it.
What works instead: Document BEFORE and AFTER.
Before guests arrive:
- Take a full walkthrough of every room
- Include wide shots of furniture, walls, floors
- Get close-ups of any existing wear or damage
- Note the date and condition in writing
After guests check out:
- Use the exact same spots and angles as your before photos
- Take photos of new damage in context (show the damaged item AND the surrounding room)
- If something broke, photograph it from multiple angles
- Document what was clean and what's now dirty
This creates a clear before-and-after story. Airbnb can see the difference. That's proof.
Mistake 2: Using Your Regular Camera App (No Way to Prove Photos Weren't Edited)
Most hosts take photos with their phone's default camera app. Nothing wrong with that for family photos. But when money is on the line, you need something stronger.
Why it fails: In 2026, anyone can edit photos. Hosts can too. Airbnb knows that. When you submit a before-and-after photo, they have no way to verify you didn't edit the "after" photo to look worse than it really is. Reviewers have to stay skeptical by default.
Claims can get delayed or denied when reviewers can't rule out photo manipulation.
What works instead: Use a camera app that locks photos at the moment you take them.
Look for apps that:
- Create a timestamp you can't fake or remove
- Prove the photo location (GPS lock)
- Show it wasn't edited after capture
- Create a verification link you can share with Airbnb
Apps like this exist. Some are free. The idea is that when you send a photo to Airbnb, they can verify it's genuinely unedited. That removes the doubt.
Full disclosure: I'm the creator of ProofMi, which does exactly this. But there are other options too. The key is using something better than your phone's default camera.
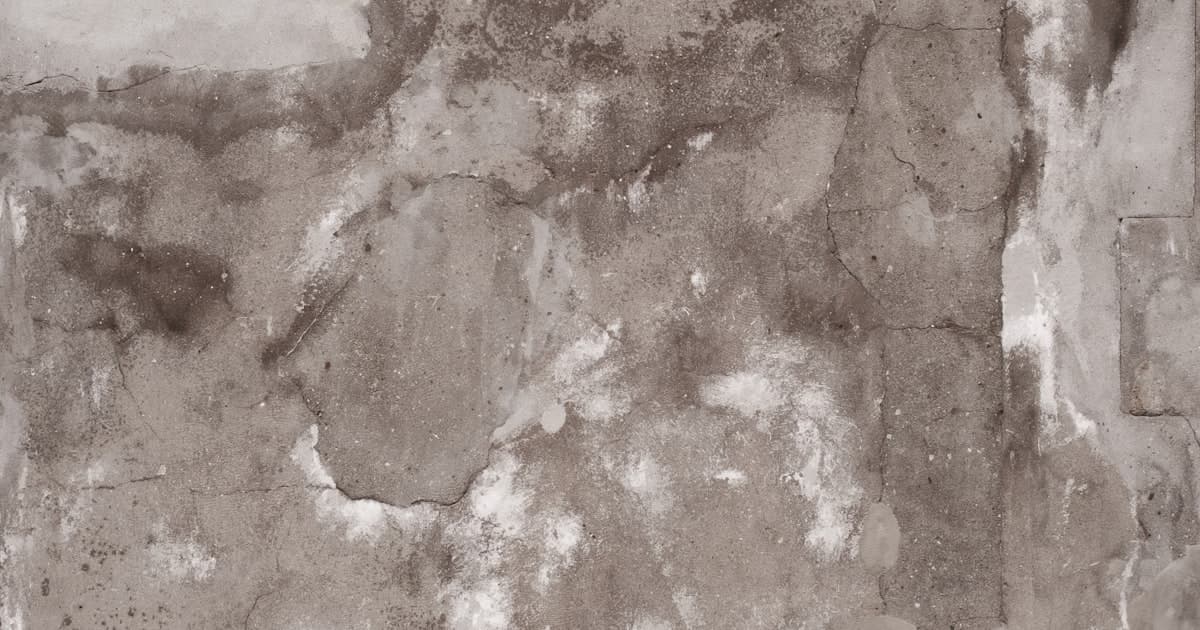
Mistake 3: Not Documenting Every Room (Missing the Bigger Picture)
Most hosts document the damage. They don't document the entire property condition.
Why it fails: When you submit one photo of a stain on the carpet, Airbnb has only that photo. They can't see:
- That the rest of the carpet is clean
- That the furniture wasn't damaged
- That the walls and doors are fine
- That the stain is localized and small
Without context, even a minor stain looks suspicious. Did the host already have stains? Are they trying to blame the guest for existing damage?
What works instead: Create a full property inspection.
Take photos of:
- Every room (bedroom, living room, kitchen, bathrooms, hallways)
- Wide shots first (the full room), then close-ups of any issues
- All surfaces: carpet, furniture, walls, doors, appliances
- Any damage (with clean areas nearby for comparison)
- Date each set clearly
The goal is to show the full before-and-after condition. When Airbnb sees a complete picture, they can trust your claim. A single photo looks like you're cherry-picking. A full inspection looks like proof.
Mistake 4: Waiting Too Long to File (Airbnb Has Deadlines)
Some hosts wait days or even a week after checkout to take damage photos. By then, the guest is gone. Time has passed. The memory is fuzzy.
Why it fails: Airbnb's policy is clear. You have to report damage within 72 hours of checkout. If you wait longer, the claim gets tougher to approve. Why? Because Airbnb knows you might have gotten the damage later and are trying to blame the guest.
Plus, if you don't photograph quickly, the damage might get worse (a small stain gets bigger, a dent gets more visible after the area settles). Time works against you.
What works instead: Document damage the same day guests check out.
Set a routine:
- Guest checks out
- You do a walkthrough immediately (same day)
- Take before photos (clean areas) and damage photos (any issues)
- Upload to a safe place (cloud storage, email, your documentation system)
- File the claim within 24 hours
This creates a clear timeline. Airbnb knows the damage was found right away. They're more likely to approve.
Mistake 5: Sharing Individual Photos Instead of an Organized Report
Here's what many hosts do: Find damage. Take 10 photos with their phone. Text or email them to Airbnb as separate files. No notes. No order.
Why it fails: Airbnb receives a jumbled pile of photos. One is the carpet stain. One is the broken lamp. One is a random shot of the kitchen. The team reviewing it can't follow the story. They have to piece it together.
Disorganized evidence looks unprofessional. It also wastes time. Airbnb's claims team is handling hundreds of claims. If yours isn't clear, it moves slower. It might even get rejected because the team can't make sense of it.
What works instead: Present your photos as a clear inspection report.
Structure it like this:
- Summary: Date of checkout, description of damage found
- Room-by-room breakdown: Include before and after for each area
- Damage closeups: Specific photos of each item or area with damage
- Wide context shots: Show the damage in relation to the whole room
- Timeline: When was this discovered? When were photos taken?
Even a simple document does this:
- Google Doc: Upload photos with captions explaining each one
- PDF: Use a free tool to organize photos and add notes
- WhatsApp or email: Send a clear message FIRST explaining what's attached, then send organized photos
When Airbnb sees a structured report instead of random photos, they take it more seriously. It shows you're serious. It's easier to approve.
How to Build the Right System
The five mistakes above boil down to one issue: Proof that can be verified.
A broken lamp photo is just a photo. Airbnb can't tell if you broke it yourself for a claim. A timestamped, location-locked, unedited photo of the lamp—plus before-and-after shots of the whole room, organized in a clear report—is proof.
Here's a step-by-step process for hosts:
1. Before Guests Arrive
- Do a full walkthrough with a camera app that locks photos (timestamp + GPS)
- Document every room: wide shots first, then close-ups
- Save these photos to cloud storage (Google Drive, iCloud, etc.)
- Write down the date and condition
2. During the Stay
- Take photos of any maintenance issues or guest-reported problems same-day
- Continue using the same camera method
3. After Checkout
- Within 2 hours, do a checkout walkthrough
- Photograph any damage in the same locations as your before photos
- Use the same camera app for consistency
- Get wide shots showing context, then close-ups of damage
- Organize everything: before photos in one folder, after photos in another
4. File the Claim
- Write a clear summary: "Damage found on [date] during checkout inspection"
- Attach an organized report with labeled photos
- Include the timestamp and location proof if possible
- File within 24 hours (never wait more than 72 hours)
5. Follow Up
- Airbnb will ask questions. Answer promptly.
- Share additional photos or context if asked
- Be honest. Don't exaggerate damage or make false claims
This isn't just about winning one claim. It's about building a system that protects you.
Why Hosts Lose Claims (The Real Reason)
Airbnb doesn't want to deny legitimate claims. They lose money when they do. But they have to be careful. Hosts sometimes exaggerate damage. Some file false claims.
So Airbnb looks for three things in every claim:
- Proof the damage is real (clear photos, not blurry or edited)
- Proof it happened during this guest's stay (before-and-after, timeline)
- Proof it's worth the amount claimed (photos that match the cost)
If your photos check all three boxes, your claim gets approved. If one box is empty, it gets denied.
Most denials happen because the first two boxes are empty. The host has a photo of damage. That's it. No proof it's real. No proof it happened with this guest.
That's why the system matters. It fills all three boxes automatically.
Questions Hosts Have
Q: Do I need an expensive camera to document damage? A: No. Your phone is fine. The key is using an app that proves the photo wasn't edited. A $1,000 camera without proof is worth less than a phone photo with a verified timestamp.
Q: What if I can't use before photos because I didn't know damage would happen? A: You can still win. Use "context shots" of clean areas near the damage, photos from multiple angles, and clear documentation of when you found it. The more detail, the easier it is for Airbnb to believe you.
Q: How long should I keep photos? A: Airbnb has a 1-year statute of limitations on damage claims. Keep your photos for at least that long. Use cloud storage so you can't lose them.
Q: Should I hire a professional cleaner to document damage? A: For major damage, it helps. But most hosts don't need to. Clear photos and a timeline usually do the job.
Q: What if Airbnb still denies my claim? A: You have the right to appeal. Submit additional photos, expert estimates, or receipts. If you have verification that proves your photos are real and weren't edited, include that. It often works.
The Bottom Line
The difference between a paid claim and a rejected one usually isn't about the damage. It's about the proof.
Airbnb wants to believe you. You're a host following the rules. But they need evidence they can verify. Photos with timestamps, before-and-after documentation, organized reports—these create the evidence.
Do this, and you don't worry about damage claims. You know you'll have the proof to back it up.
Sample Appeal Letter Template
If your claim gets denied, you have the right to appeal. Here's a structure that works:
Subject: Appeal of Denied AirCover Claim #[CLAIM_ID]

Dear Airbnb Claims Team,

I'm writing to appeal the denial of damage claim #[CLAIM_ID] from [guest name, checkout date].

Original issue: [Brief description of damage]

Why the initial submission was incomplete: [Explain what was missing]

Additional evidence now provided:
- Before/after photos showing [specific damage details]
- Timeline: Damage discovered [date/time], reported [date/time]
- Professional estimate: [attach estimate if applicable]
- Photos verified at [time/location] with [verification method]

I request reconsideration based on this additional documentation.

[Your name and contact info]
Submit this within 30 days of the original denial. Keep your tone professional, not emotional.
What's New in This Update
- Added verified approval-rate statistics from Avada Properties' analysis of 20,000+ damage claims
- Included sample appeal letter template for hosts facing claim denials
- Clarified the timeline: Airbnb's 14-day filing window (not just 72-hour damage discovery window)
Disclosure: I'm the founder of ProofMi, a property inspection app. This guide is based on real host experiences and Airbnb's published policies. ProofMi is one way to document your property with verifiable photos, but the system I've described here works with any method that creates verified, unedited photos.